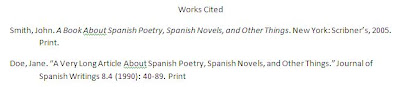
It seems like everyone's working on a paper at the library right now. If you've got one you're working on, too, you might need to include some kind of Works Cited section. When formatting your Works Cited section, don't fiddle around with tab indents and rulers - you're making it harder on yourself than you have to!
(The instructions below assume you're using MS Word 2007, available on library computers, but you can probably carry some of this over to other versions of Word and similar programs.)
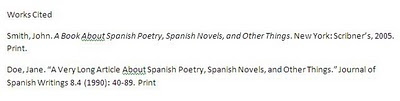
Let's say you've got a Works Cited page with a few entries, like the one above (yes, I made those entries up). You'd like every line after the first line of an entry to be indented, but you're not sure how to do it without messing up the formatting on the rest of your document (assuming that this is part of a larger paper), or you have no idea how to begin formatting this at all. Take a look at the next image:
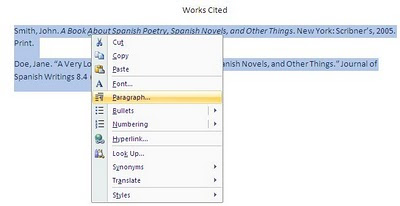
I centered "Works Cited" and then highlighted the entries. I right-clicked on the highlighted entries and chose "Paragraph" from the menu that popped up.
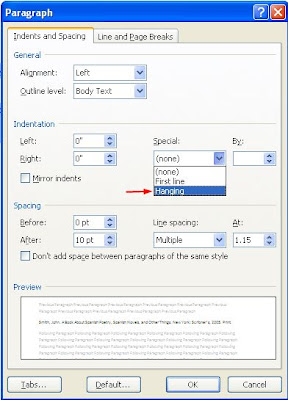
Under "Indentation," I clicked the "Special" drop down menu and chose "Hanging." This adds hanging indents to the entries I highlighted, making my Works Cited document look like the picture below. Now, if I wanted, I could add more entries, which would all automatically be perfectly indented, or I could edit the ones already there (maybe italicize my journal title?).